- 167 Lượt xem
- 9/4/2023
Bài viết này sẽ hướng dẫn cách tạo 1 themes mới cho wordpress từ một giao diện html thuần.
1) Chuẩn bị
1.1. Chuẩn bị giao diện tĩnh cho themes sắp tạo.
Để bắt đầu tiến hành, chúng ta cần có giao diện html, css, js tĩnh. Nếu bạn không có khả năng cắt giao diện thì có thể clone giao diện từ 1 website khác bằng cách sau:
Chuột phải chuột vào giao diện trên website bạn muốn clone, chọn Save as… và lưu dữ liệu về máy tính. Nhưng vậy bạn sẽ có 1 giao diện gồm ccác loại file chính như sau: html, css, js, hình ảnh (png, jpg,…).

1.2 Tạo themes mới
– Truy cập vào https://underscores.me/
– Đặt tên mà bạn muốn cho themes và nhấn generate để tải themes về.
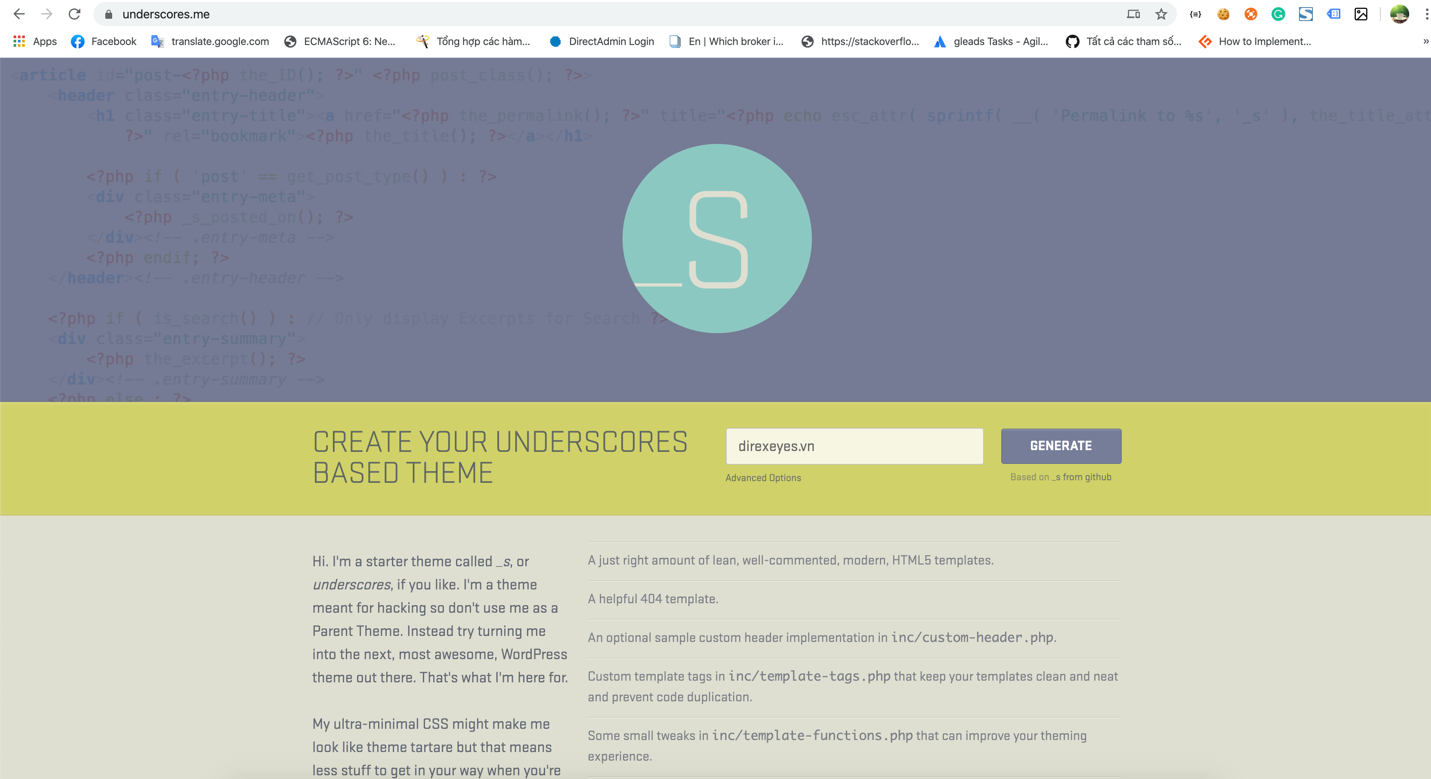
– Cài đặt themes này vào website wordpress của bạn.
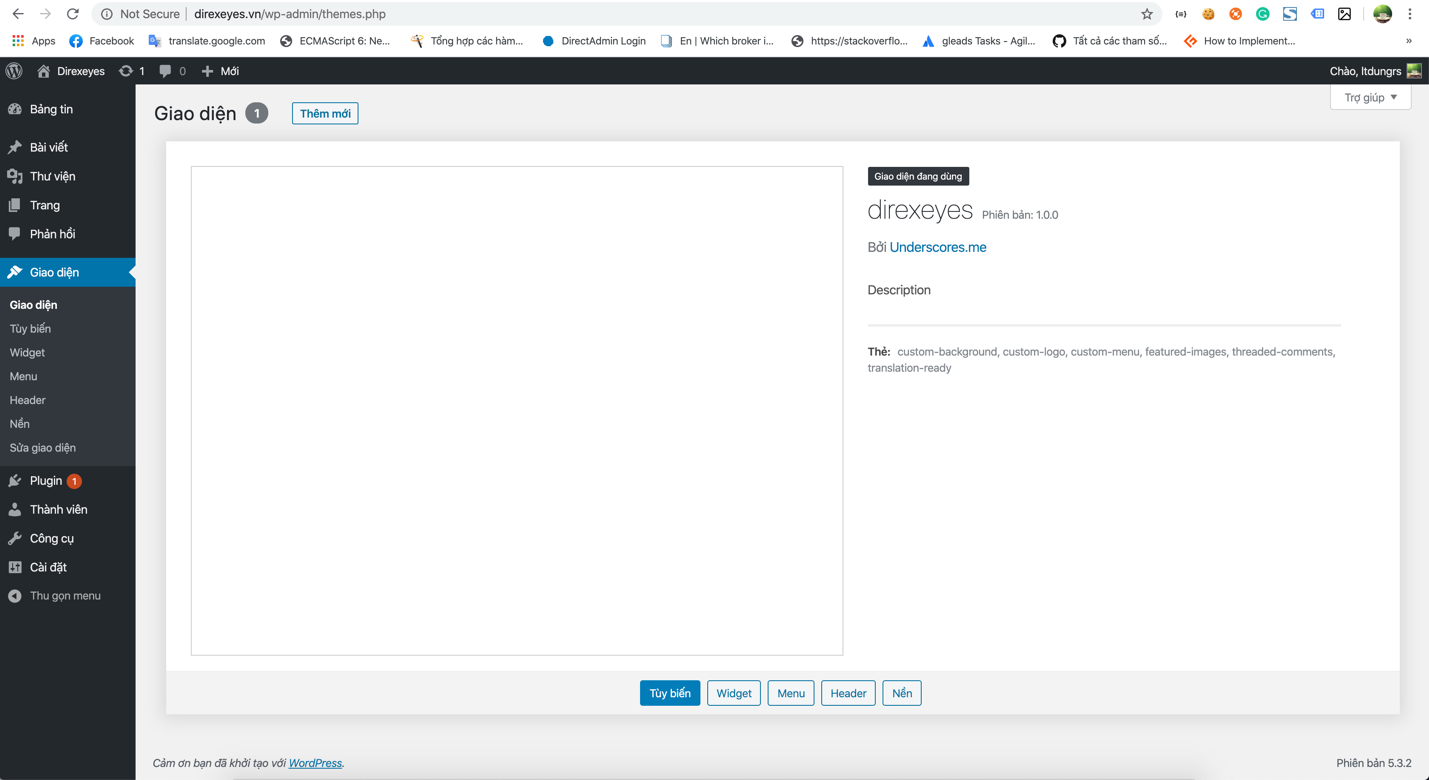
1.3. Gắn toàn bộ các file resources cần thiết của giao diện tĩnh vào folder themes vừa tạo.
Mở folder html tĩnh của chúng ta lên, copy toàn bộ các file: css, js, hình ảnh vào folder của themes trong source code wordpress của chúng ta.
Đường dẫn folder của themes:
<<folder chứa source code>>wp-contentthemes<<tên themes>>

1.4 Giới thiệu cấu trúc của một website wordpress
Đây là những thành phần trong themes mình sẽ chỉnh sửa trong nội dung bài viết này. Mục tiêu là để tạo ra 1 website Tin tức, nhằm hiển thị thông tin của một tổ chức và cập nhật bài viết.
| STT | Thành phần | Nội dung | File |
| 1 | Header | Đây là phần header của cả website, chứa cả menu. | header.php |
| 2 | Footer | Đây là phần footer của cả website, chứa cả menu. | footer.php |
| 3 | Pages | Đây là các trang riêng biệt của website. Mỗi trang ta sẽ tạo 1 file template tương ứng. Trang Home sẽ là home.php, trang About us là about-us.php, Contact us là contact-us.php. Copy trang index.php và đổi lại phần Template Name | [name].php |
| 4 | Blog (Trang show tất cả các category) | Bạn vào folder của themes, tự copy ra 1 file blog.php từ file index.php. Trang này sẽ cần dùng khi hiển thị danh sách toàn bộ category của website. | blog.php |
| 5 | Category (Single category) | Mặc định. Dùng để hiện danhs sách toàn bộ bài viết thuộc 1 category. | archive.php |
| 6 | Single post (Tất cả các trang con) | Mặc định. Dùng để hiệnnội dung 1 bài viết. | single.php |
Còn đây là cấu trúc hoàn chỉnh của 1 themes wordpress, để tìm hiểu sâu và toàn diện về wordpress bạn có thể nghiên cứu thêm. Trong bài viết này chỉ tạm thời để cập đến những phần phía trên thôi.

1.5 Các plugin cần cài đặt.
| STT | Plugin | Công dụng | Link |
| 1 | ACF Advanced Custom Fields Pro | Tạo thêm các custom field để thay đổi nội dung cho các loại trang, bài post. | Link |
| 2 | CPT Custom Post Type | Tạo thêm các loại bài viết, loại category tương ứng cho 1 trang có các loại bài viết và category hoàn toàn tách biệt nhau. (Plugin này chưa dùng ở bài này). | Link |
| 3 |
Thêm code vào cuối file function.php
add_action('acf/init', 'my_acf_op_init');
function my_acf_op_init()
{
	// Check function exists.
	if (function_exists('acf_add_options_page')) {
		// Register options page, each language (polylang) will have one setting tabs.
		foreach (pll_languages_list($args) as $lang) {
			acf_add_options_page(array(
				'page_title'    => "Theme Settings (" . strtoupper($lang) . ")",
				'menu_title'    => "Theme Settings (" . strtoupper($lang) . ")",
				'menu_slug'     => "theme-${lang}-settings",
				'post_id'       => $lang
			));
		}
	}
}
Hàm này dùng để thêm 1 tab để config những giá trị chung cho cả trang web. Để phát triển nội dung website đa ngôn ng, thì ta sẽ cần cài đặt thêm plugin Polylang.

2) Clone và gắn custom fields có thể tùy chỉnh giao diện trang Home, Header, Footer của themes.
1) Header
– Gắn toàn bộ phần code html header vào file header.php.
– Đổi link các resources (image, font, css, js) thành <?php bloginfo(‘stylesheet_directory’) ?>
Ví dụ:
<link rel="stylesheet" type="text/css" href="<?php bloginfo('stylesheet_directory') ?>/css/slick-theme.css">
<link rel="stylesheet" type="text/css" href="<?php bloginfo('stylesheet_directory') ?>/css/animate.css">
<link rel="stylesheet" type="text/css" href="<?php bloginfo('stylesheet_directory') ?>/css/bootstrap-select.min.css">
<link rel="stylesheet" type="text/css" href="<?php bloginfo('stylesheet_directory') ?>/css/bootstrap.min.css">
<link rel="stylesheet" type="text/css" href="<?php bloginfo('stylesheet_directory') ?>/css/datepicker.css">
<?php

/**
 * The header for our theme
 *
 * This is the template that displays all of the <head> section and everything up until <div id="content">
 *
 * @link https://developer.wordpress.org/themes/basics/template-files/#template-partials
 *
 * @package BBCISG
 */
add_filter('body_class', 'custom_class');
?>
<!doctype html>
<html <?php language_attributes(); ?>>

<head>
	<meta charset="utf-8">
	<meta http-equiv="X-UA-Compatible" content="IE=edge,chrome=1">
	<meta name="viewport" content="width=device-width,initial-scale=1,shrink-to-fit=no">
	<link rel="stylesheet" type="text/css" href="<?php bloginfo('stylesheet_directory') ?>/css/slick-theme.css">
	<link rel="stylesheet" type="text/css" href="<?php bloginfo('stylesheet_directory') ?>/css/animate.css">
	<link rel="stylesheet" type="text/css" href="<?php bloginfo('stylesheet_directory') ?>/css/bootstrap-select.min.css">
	<link rel="stylesheet" type="text/css" href="<?php bloginfo('stylesheet_directory') ?>/css/bootstrap.min.css">
	<?php wp_head(); ?>
</head>
<?php
$menu_name = 'menu-1';
$locations = get_nav_menu_locations();
$menu = wp_get_nav_menu_object($locations[$menu_name]);
$menu_items = wp_get_menu_array($menu);
?>
<body <?php body_class(); ?>>
	<?php wp_body_open(); ?>
Trong đó:
| STT | Hàm | Công dụng | Vai trò |
| 1 | <?php bloginfo(‘stylesheet_directory’) ?> | In ra giá trị là đường dẫn đến folder của themes đó. | Cần thiết |
| 2 | <?php language_attributes(); ?> | In ra tùy chọn ngôn ngữ của website | Cần thiết |
| 3 | <?php bloginfo( ‘charset’ ); ?> | In ra tùy chọn charset của website | Cần thiết |
| 4 | <?php wp_head(); ?> | Gen ra các phần head của wordpress, plugin như meta, SEO,… | Cần thiết |
| 5 | <?php body_class(); ?> | Thêm các class của body vào | Cần thiết |
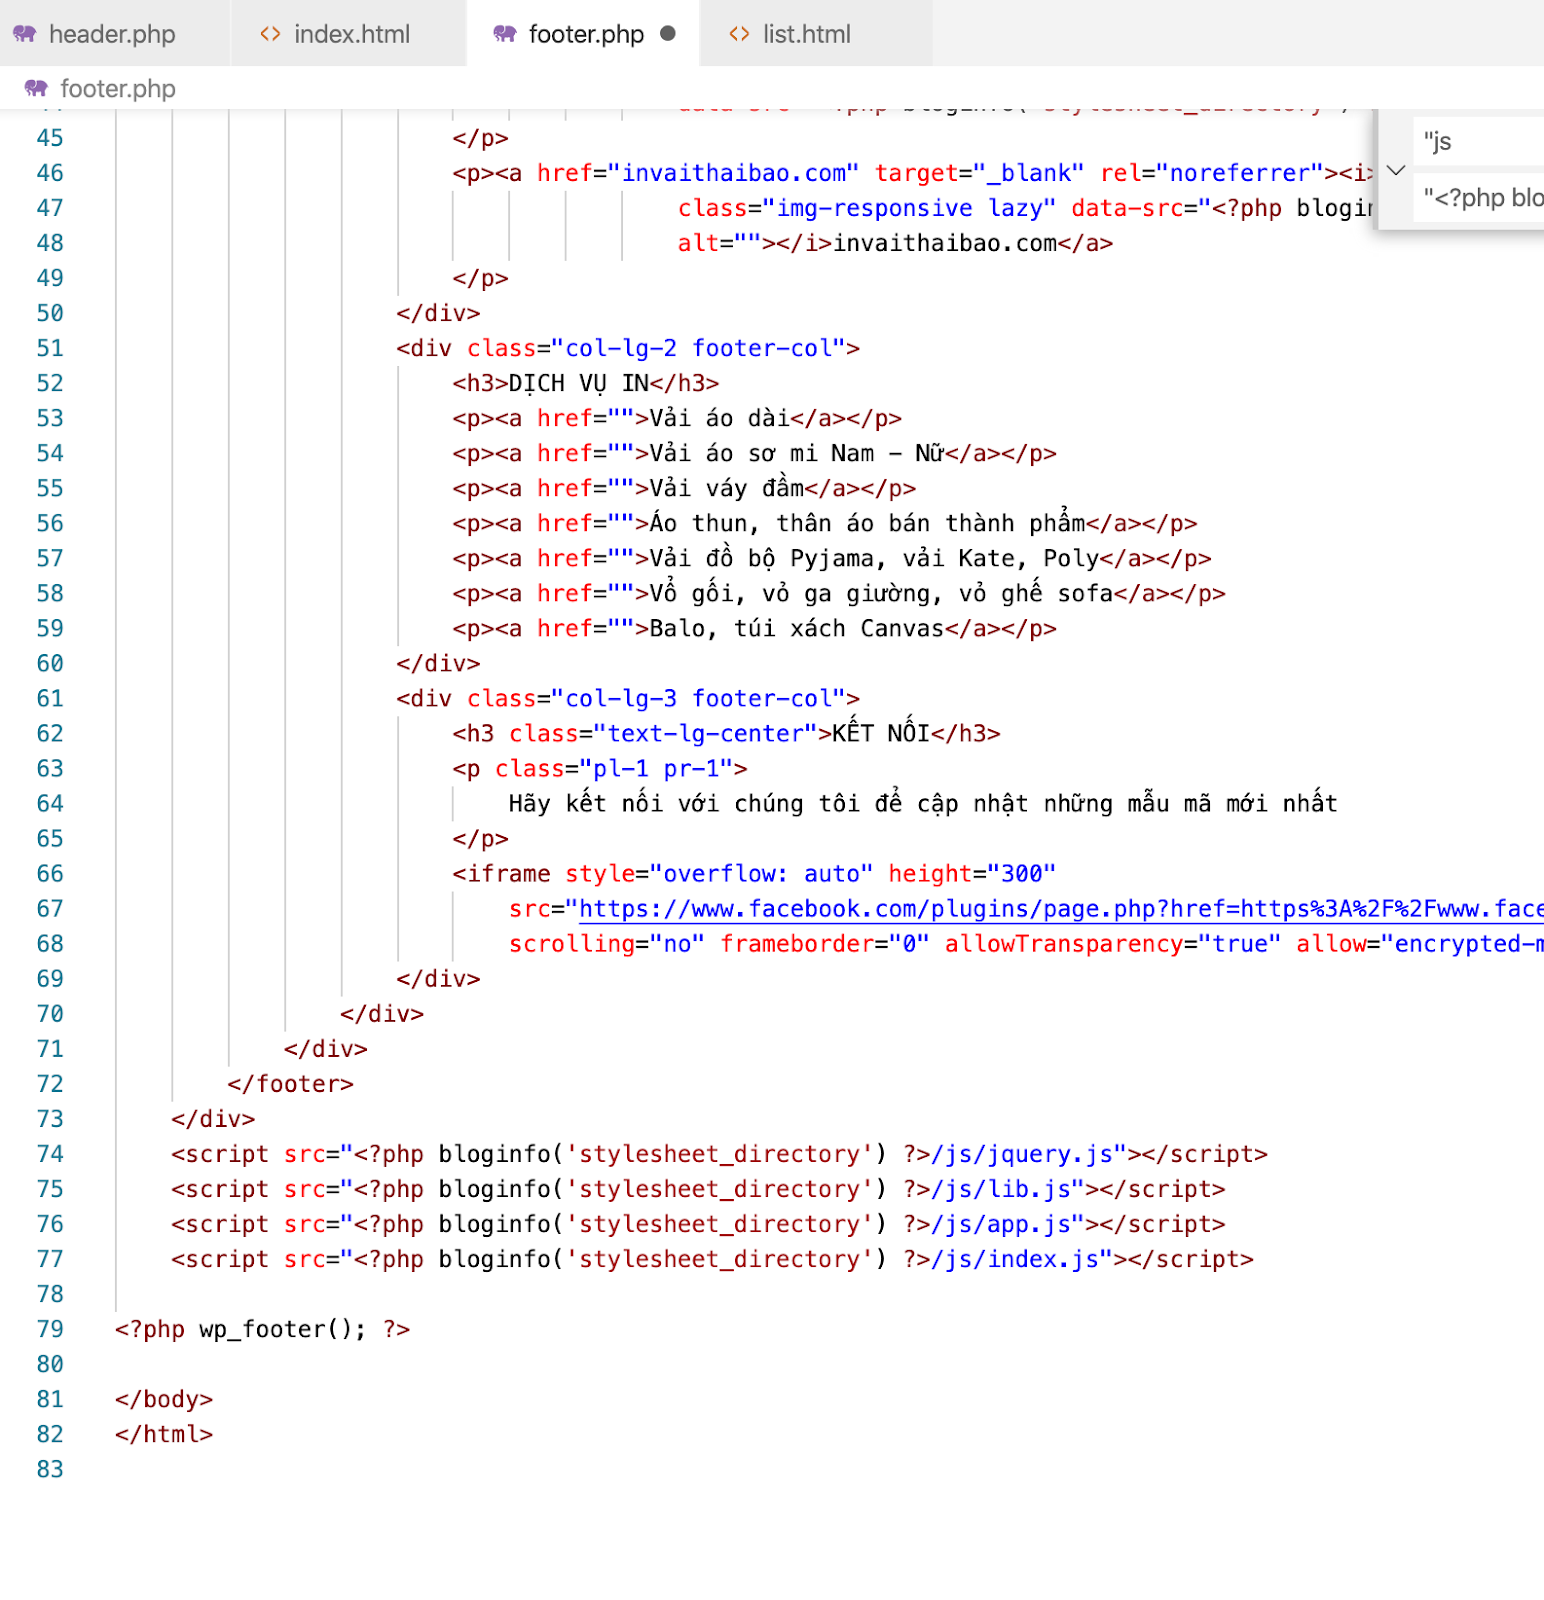
2) Footer
– Gắn toàn bộ phần code html footer vào file header.php.
– Đổi link các resources (image, font, css, js) thành <?php bloginfo(‘stylesheet_directory’) ?>
Ví dụ:
Trong đó:
| STT | Hàm | Công dụng | Vai trò |
| <?php wp_footer(); ?> | WordPress sẽ chèn thêm các code cần thiết ở cuối trang (script cho fb plugin, google tagmanager,…) | Cần thiết |
3) Phần Menu
Menu là phần khá khó, mình chỉ để code ở đây mọi người ráng đọc và hiểu code. Đây là menu sử dụng cả Custom Fields, PolyLang.


<header class="header-navbargl">
   <nav class="navbar navbar-expand-lg">
      <div class="container">
         <a class="navbar-brand sticky_logo" href="<?php echo home_url('/'); ?>">
         <?php
            $logo2 = get_field('logo2', pll_current_language('slug'));
            $logo = get_field('logo', pll_current_language('slug'));
            $logo2_id = $logo2['ID'];
            $logo_id = $logo['ID'];
            $size = 'full';
            echo wp_get_attachment_image($logo2_id, $size, "", array("class" => "logo2"));
            echo wp_get_attachment_image($logo_id, $size, "", array("class" => "logo"));
            ?>
         </a>
         <button class="navbar-toggler" type="button" data-toggle="collapse" data-target="#navbarSupportedContent" aria-controls="navbarSupportedContent" aria-expanded="false" aria-label="Toggle navigation">
         <span class="menu-toggle"></span>
         </button>
         <div class="collapse navbar-collapse justify-content-center" id="navbarSupportedContent">
            <?php
               if (have_rows('btn_order', pll_current_language('slug'))) :
               	while (have_rows('btn_order', pll_current_language('slug'))) : the_row();
               ?>
            <p class="btn-setup">
               <a <?php
                  $class = 'login_btn_vi';
                  if (pll_current_language() == 'vi') :
                  ?> class="<?php echo $class; ?>" <?php
                  endif;
                  	?> href="<?php the_sub_field('link', pll_current_language('slug')); ?>"><?php the_sub_field('text', pll_current_language('slug')); ?>
               </a>
            </p>
            <?php endwhile;
               endif; ?>
            <ul class="navbar-nav menu-gl">
               <?php
                  $c = 0;
                  $class = '';
                  foreach ($menu_items as $item) :
                  	$c++;
                  	$class = ($c == 2) ? 'mega-resource news-resources' : '';
                  	if (property_exists($item, 'children')) {
                  ?>
               <li class="nav-item sub-item dropdown" onmouseover="navbarHoverIn()" onmouseout="navbarHoverOut()">
                  <?php if ($item->url == '#') { ?>
                  <a class="nav-link link-excep"><?php echo $item->title; ?></a>
                  <?php } else { ?>
                  <a class="nav-link" href="<?php echo $item->url; ?>"><?php echo $item->title; ?></a>
                  <?php } ?>
                  <a class="dropdown-toggle icon-arrow" id="navbarDropdown" role="button" data-toggle="dropdown" aria-haspopup="true" aria-expanded="false"><i class="fal fa-angle-right"></i></a>
                  <div class="dropdown-menu" aria-labelledby="navbarDropdown">
                     <ul class="mega-menu d-flex list-unstyled <?php echo $class; ?>">
                        <?php
                           foreach ($item->children as $item_child) :
                           	$class = get_field("class_icon", $item_child->ID);
                           	$icon = get_field("fonts_icon", $item_child->ID);
                           	$desc = get_field('description', $item_child->ID);
                           ?>
                        <li class="item1">
                           <div class="item-content">
                              <h4 class="title-cl t_color2">
                                 <span class="<?php echo $class; ?>">
                                 <i class="<?php echo $icon; ?>"></i>
                                 </span>
                                 <?php if ($item_child->url == '#') { ?>
                                 <span><?php echo $item_child->title; ?></span>
                                 <?php } else { ?>
                                 <a href="<?php echo $item_child->url ?>"><?php echo $item_child->title; ?>
                                 </a>
                                 <?php } ?>
                              </h4>
                              <p class="des-link"><?php echo $desc; ?></p>
                              <?php
                                 if (property_exists($item_child, 'children')) :
                                 	foreach ($item_child->children as $item_grand) :
                                 ?>
                              <a class="nav-link" href="<?php echo $item_grand->url; ?>"><span class="arrow_carrot-right"></span><span><?php echo $item_grand->title; ?></span></a>
                              <?php
                                 endforeach;
                                 endif;
                                 ?>
                              <?php
                                 $image = get_field('image', $item_child->ID);
                                 $image_id = $image['ID'];
                                 $size = 'full';
                                 ?>
                              <?php echo wp_get_attachment_image($image_id, $size, "", array("class" => "float-right")); ?>
                           </div>
                        </li>
                        <?php
                           endforeach;
                           ?>
                     </ul>
                  </div>
               </li>
               <?php
                  } else {
                  ?>
               <li class="nav-item sub-item" onmouseover="navbarHoverIn()" onmouseout="navbarHoverOut()"><a class="nav-link" href="<?php echo $item->url; ?>"><?php echo $item->title; ?></a></li>
               <?php
                  }
                  endforeach;
                  ?>
            </ul>
         </div>
         <div class="btn-right<?php $class = ' btngleads-desktop';
            if (pll_current_language() == 'vi') : echo $class;
            endif; ?>">
            <?php
               if (have_rows('btn_order', pll_current_language('slug'))) :
               	while (have_rows('btn_order', pll_current_language('slug'))) : the_row();
               ?>
            <a class="login_btn active" href="<?php the_sub_field('link', pll_current_language('slug')); ?>">
            <?php the_sub_field('text', pll_current_language('slug')); ?>
            </a>
            <?php
               endwhile;
               endif;
               ?>
         </div>
      </div>
   </nav>
</header>
3) Trang Home
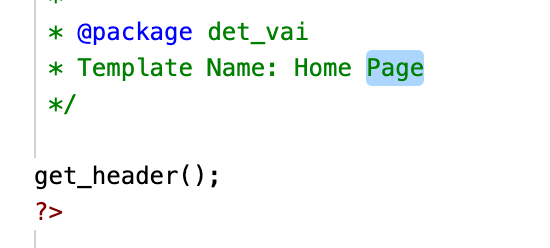
– Copy file index.php thành 1 file home.php

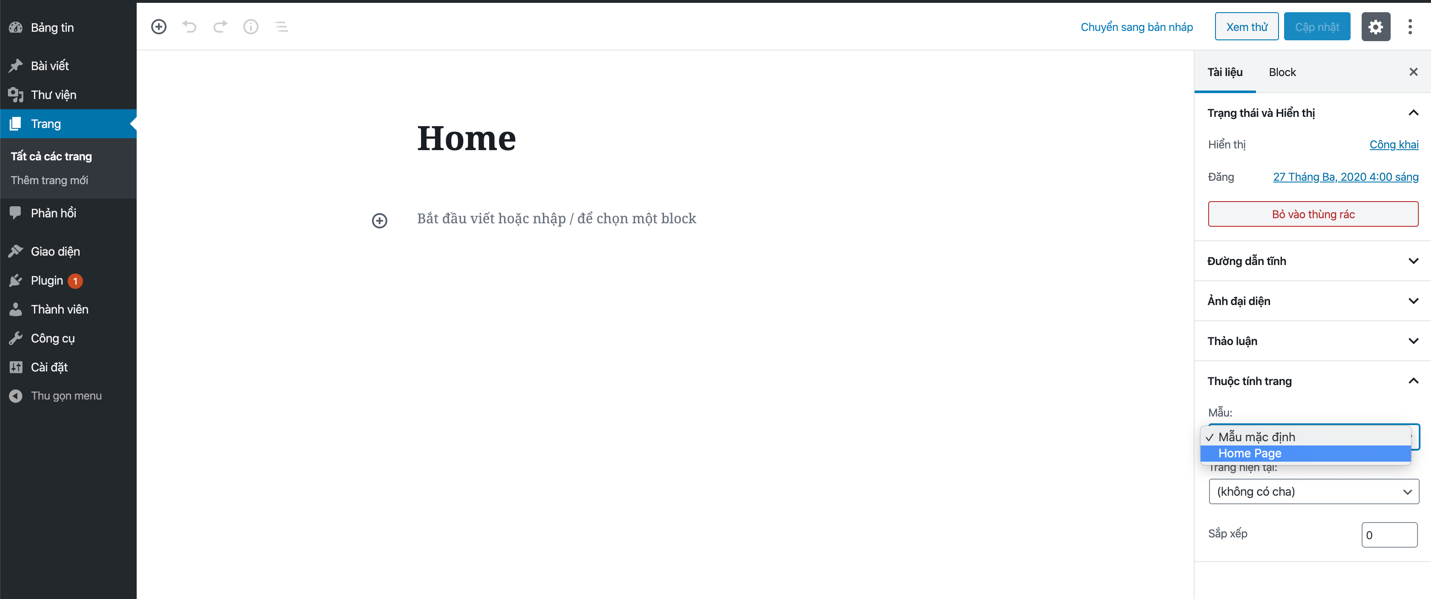
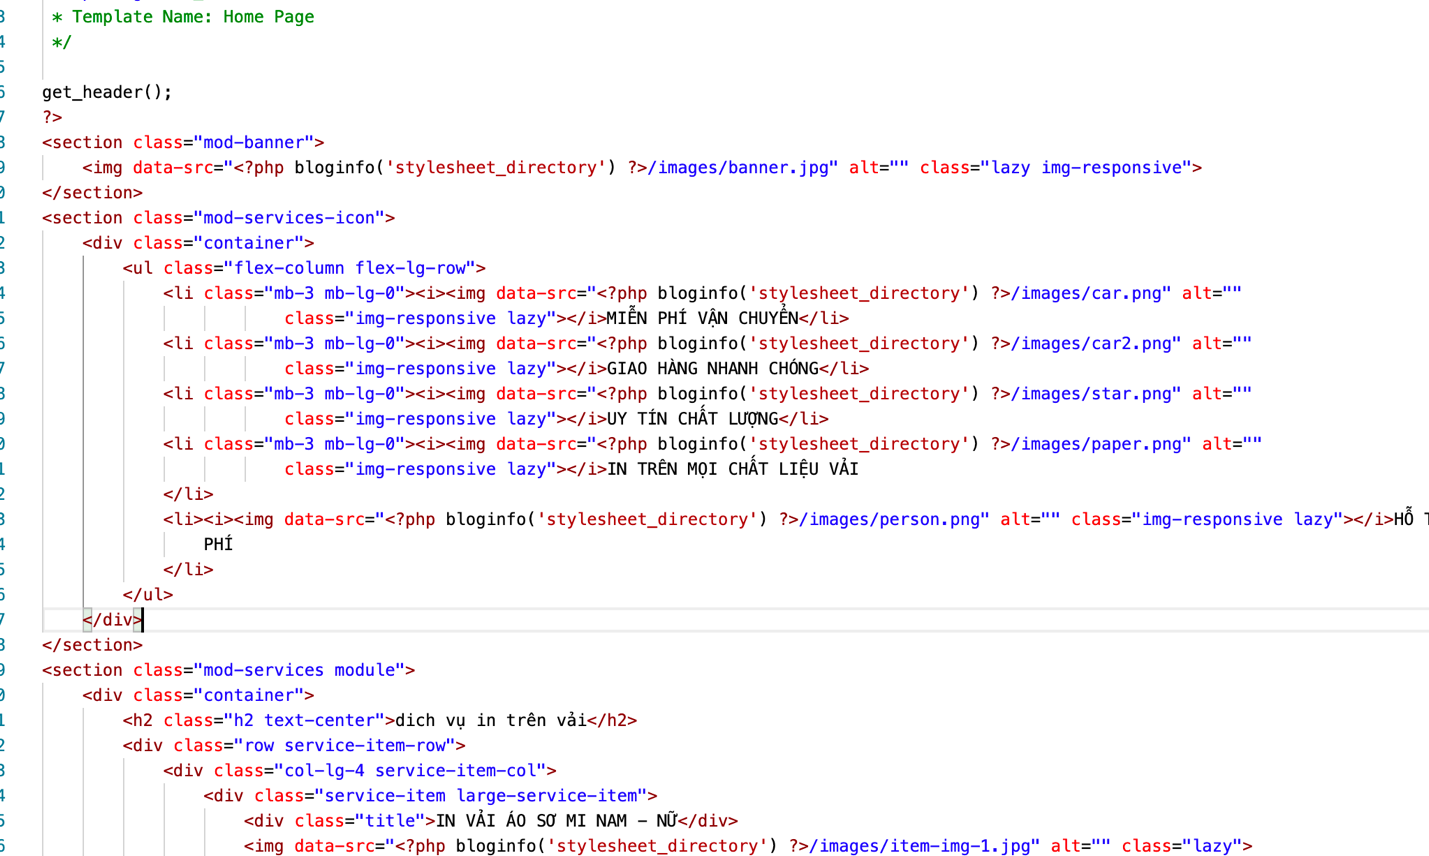
– Đặt tên Template Name cho trang này là Home Page ở đầu trang:
* Template Name: Home Page
– Upload file này lên server, sau đó vào admin của trang wordpress. Tạo 1 Trang, và setting cho trang đó sử dụng Template là trang template vừa up.
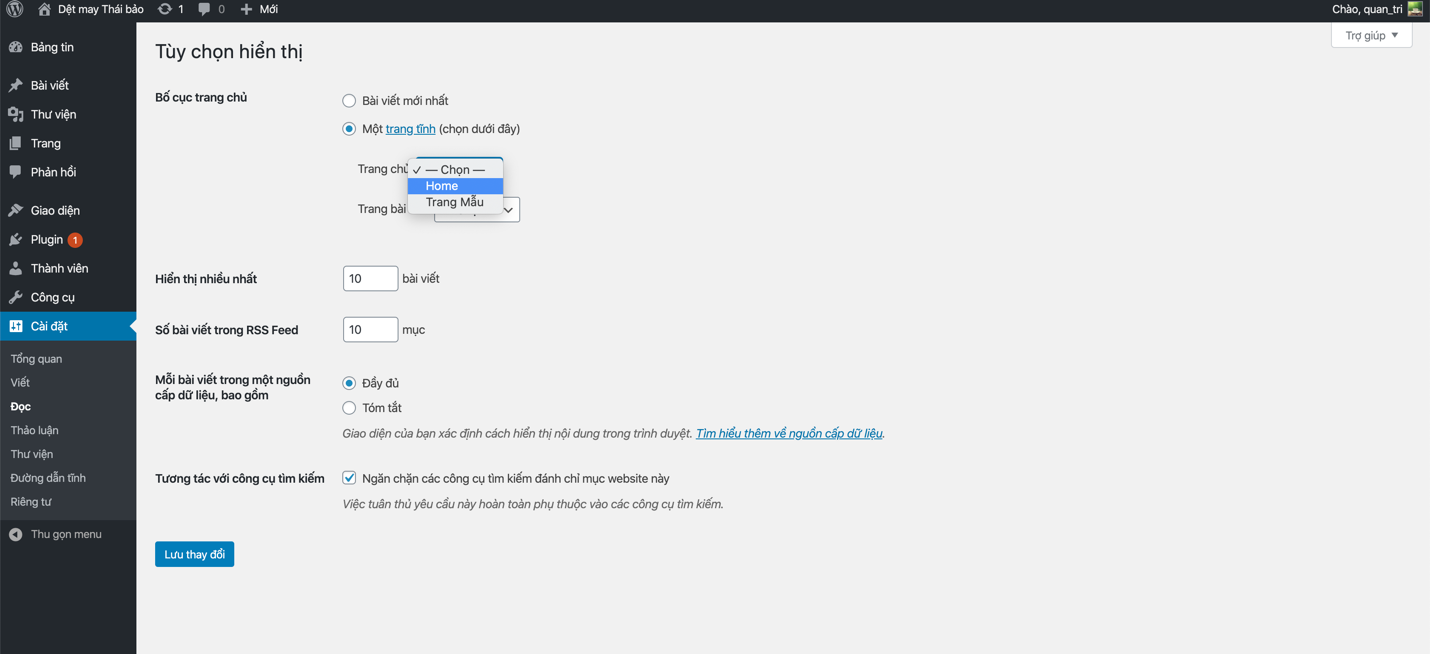
– Vào setting và cài đặt trang này là trang chủ.
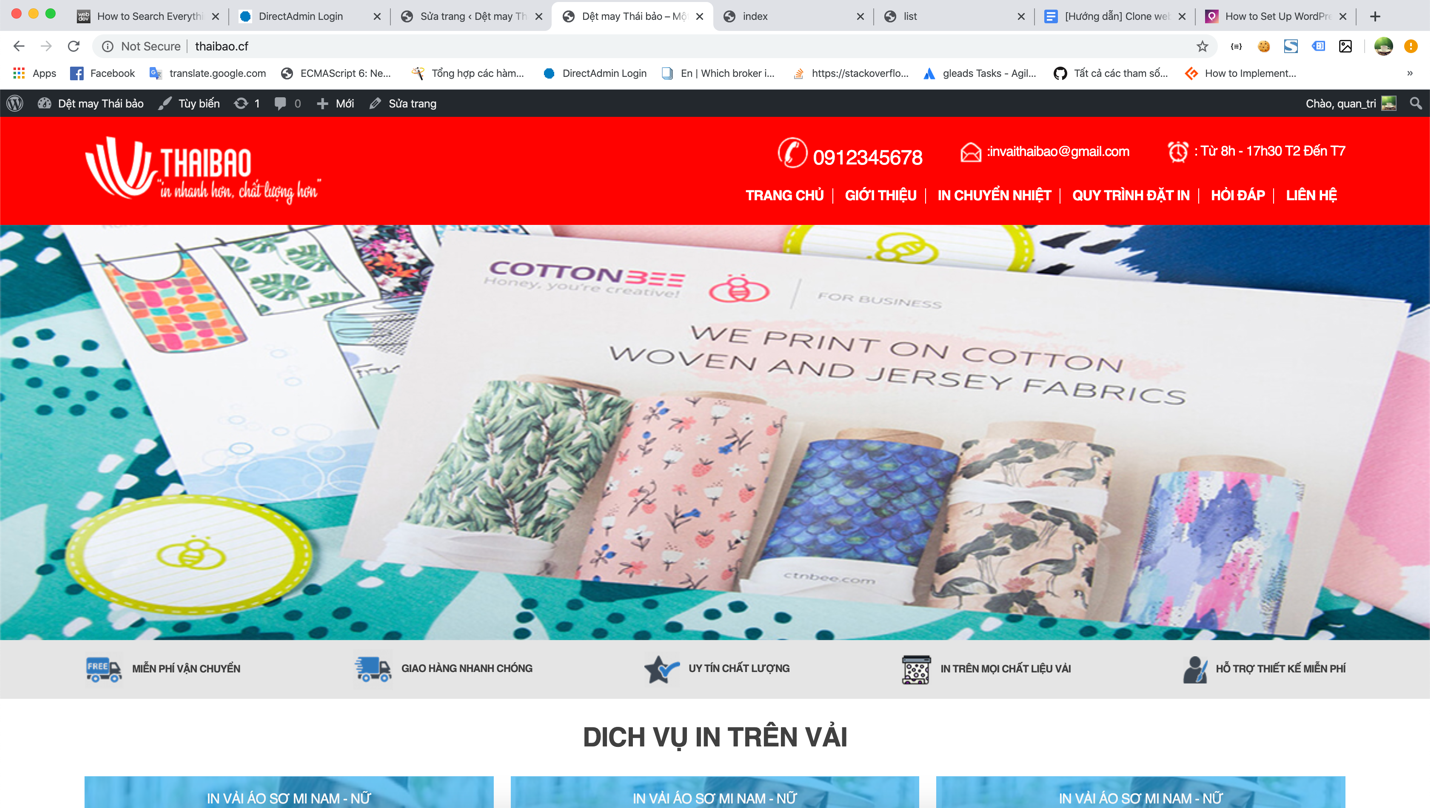
– Gắn code html của phần nội dung trang home vào file home.php này, sau đó đổi link các resources (image, font, css, js) thành <?php bloginfo(‘stylesheet_directory’) ?> để hiển thị đúng như giao diện ban đầu. Xóa hoặc comment hàm get_sidebar(); đi, vì phần này chưa dùng đến.
– Kết quả ta sẽ có giao diện trang home hiển thị giống như file tĩnh như sau:
- Sử dụng custom field để tùy chỉnh những giá trị hiển thị trên trang Home
– Sau khi đã cài đặt plugin ACF Pro, truy cập và tạo 1 custom field là home-page. Chọn “Show this field group if” là “Page Template” “is equal to” “Home Page” (tức là tất cả những trang có template là template chúng ta vừa tạo sẽ có hiện những config này).

– Các loại custom field chính cần dùng sau đây:
| STT | Loại | Công dụng |
| 1 | Text | Dùng để nhập chữ hoặc 1 đoạn văn bản |
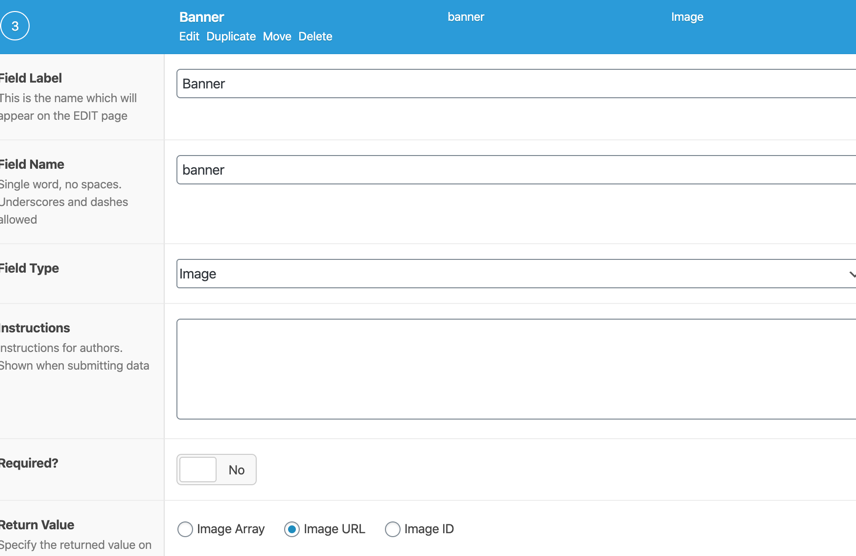
| 2 | Image | Dùng để upload và chọn hình ảnh hiển thị |
| 3 | Post Object | Dùng khi dữ liệu là 1 đối tượng từ website (trang web, bài viết, custom post field,…) |
| 4 | Group | Tạo ra 1 group custom field khác |
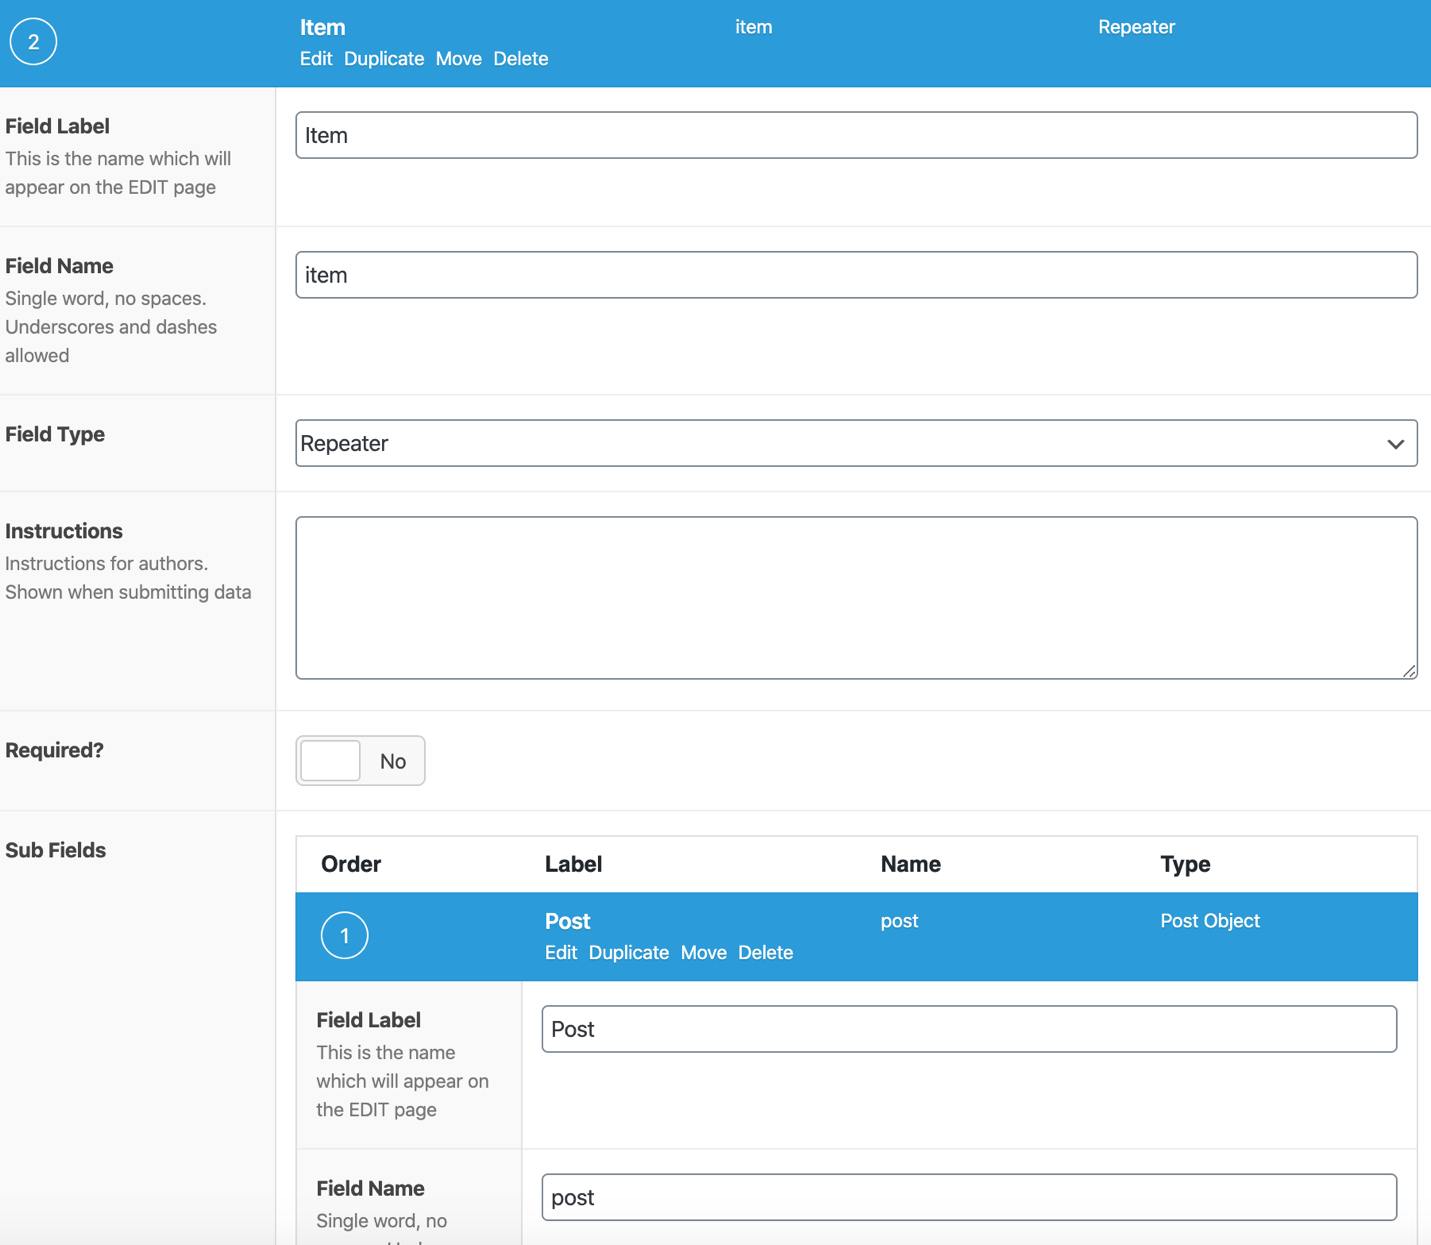
| 5 | Repeater | Tạo ra 1 group custom field khác, và các dữ liệu loại repeater này khi nhập có thể tạo ra giá trị lặp không giới hạn. |
Ví dụ về cấu trúc ACF cho 1 trang home cơ bản.

– Theo phân tích, ta có:
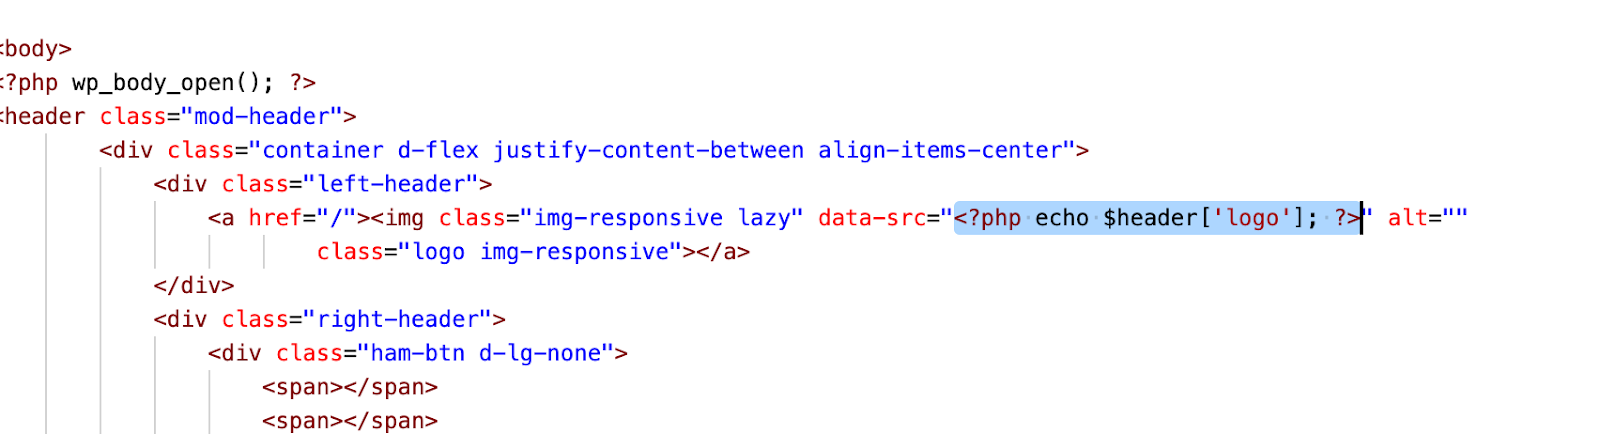
1. Logo là hình ảnh để người dùng nhập vào, nên ta dùng loại Image. Lưu ý để dễ sử dụng, nên chọn Return Value là “Image URL”.


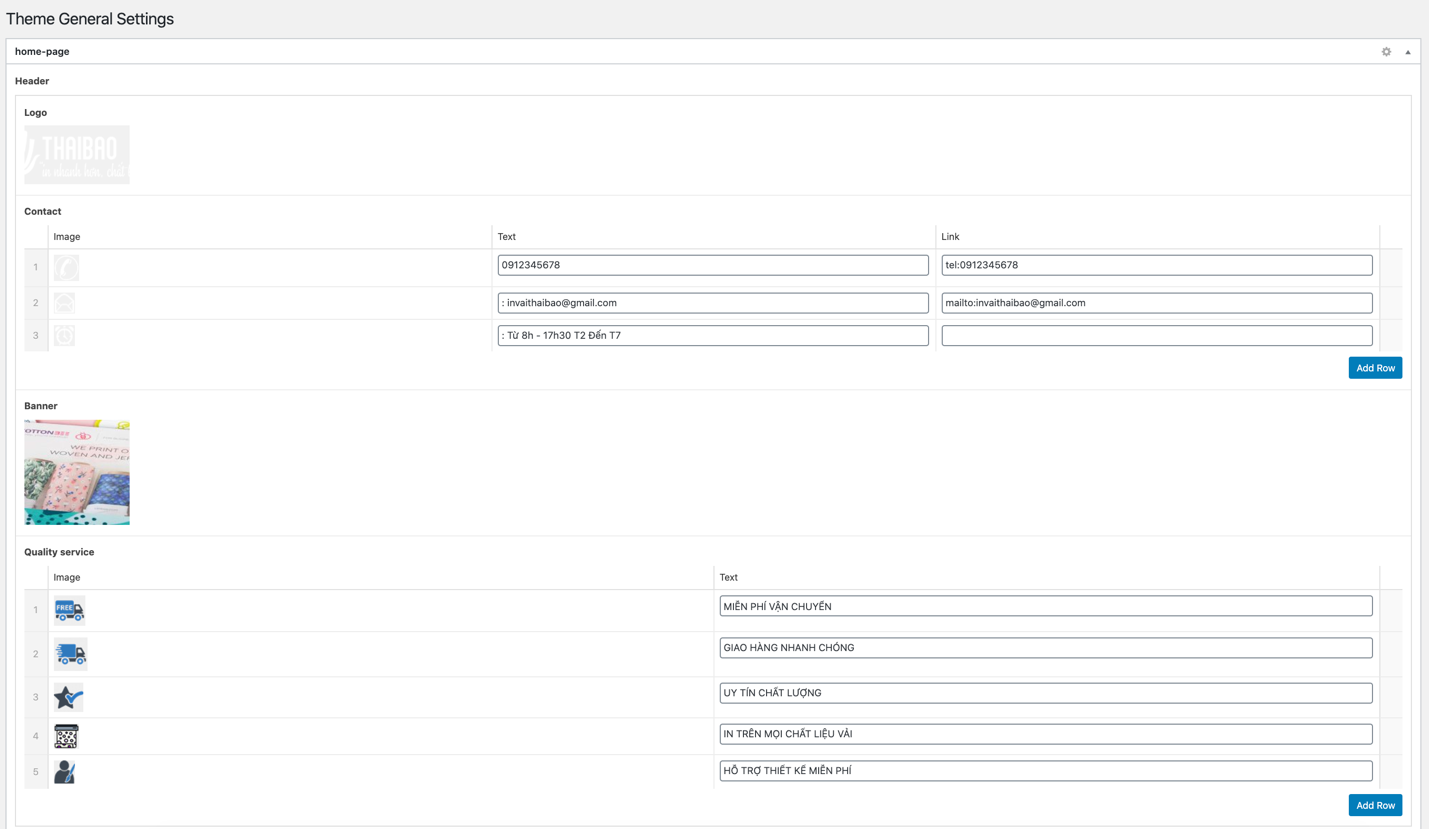
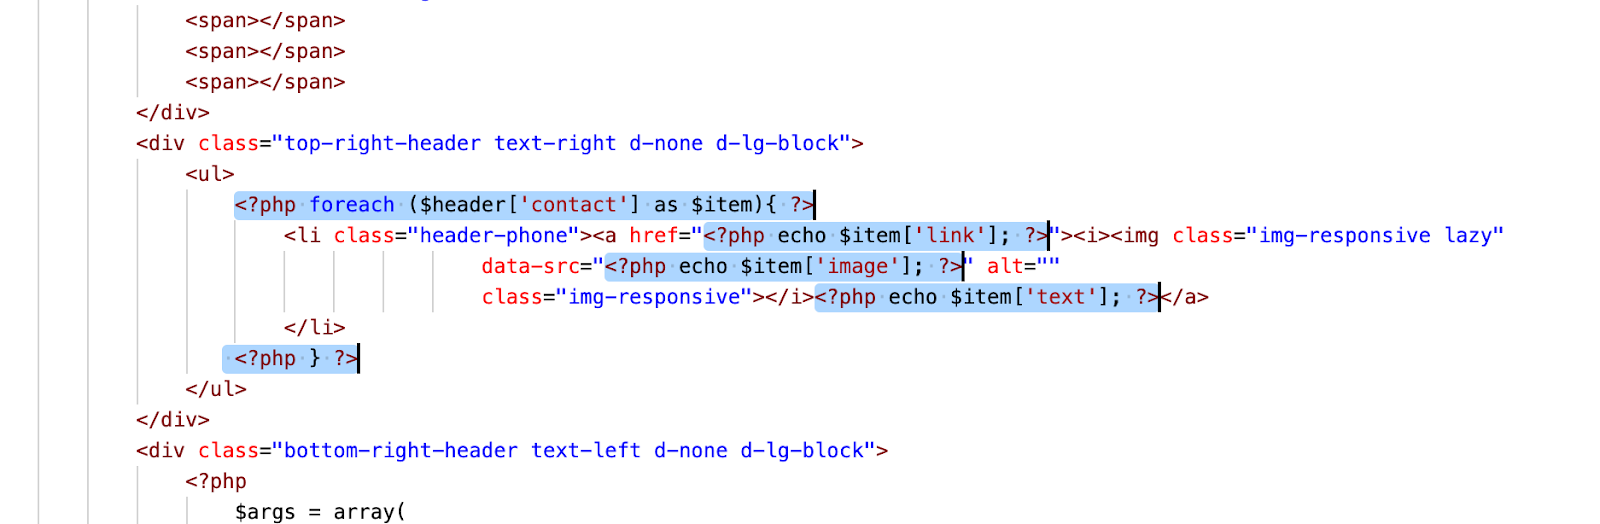
2. Phần contact là 3 item y hệt nhau, mỗi item gồm 3 phần là: hình icon, chữ và link khi bấm vào. Nên ta tạo 1 Repeater là Contact, trong đó có 3 field con là image, text, link.


– Phần menu được loại ra, vì phần này sẽ không nên dùng Custom Fields.
– Tương tự vậy, với banner cũng sẽ là loại Image.
– Và phần chất lượng dịch vụ, gồm 5 item y hệt nhau, mỗi item gồm image và text. Ta sẽ tạo field Quality service, với 2 field con là image và text.

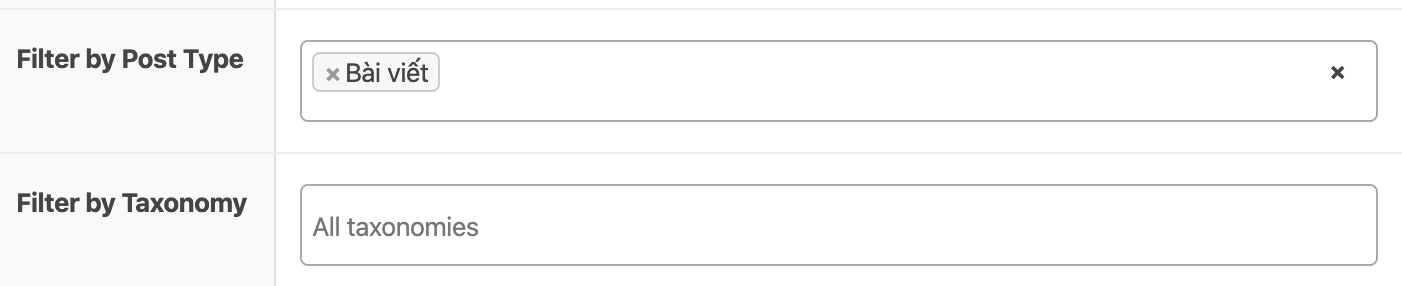
– Phần dịch vụ, ở đây ta có gồm nhiều item giống nhau. Nhưng mỗi item ở đây sẽ link tới 1 bài viết trong website nên ta sẽ tạo 1 field là item, với 1 field con là post (kiểu Post Object). Lưu ý Post Object nên cho filter là bài viết hoặc trang, để khi khách hàng chọn bài viết hiển thị nó sẽ chỉ cho chọn những bài viết thuộc loại bài viết đó (post, hoặc pages, hoặc có thể là custom post type khác). Nên chọn ddữ liệu trả về là post ID, để sau đó ta sẽ dùng wordpress query thì sẽ đồng nhất cách lấy dữ liệu post.


Sau khi tạo những custom field như trên và lưu lại, ta truy cập vào theme settings sẽ thấy những trường này để nhập dữ liệu, ta nhập dữ liệu vào như sau.
Tiếp theo, ta sẽ chỉnh sửa file header.php, footer.php, home.php để giao diện themes của chúng ta có thể lấy được dữ liệu từ các custom field vừa tạo này và hiển thị chúng.
Để lấy 1 trường từ theme setting, ta dùng đoạn code sau:

$header= get_field(‘header’, ‘options’);
(‘options’ là lấy từ Tab Theme options của template, nếu lấy field từ 1 trang hoặc 1 post ta sẽ dùng $header= get_field(‘header’, get_the_ID());)
– Với cấu trúc field header được tạo như sau:
Header (Group) – logo(Image)
– Contact (Repeater) – Image(Image)
– Text (Text)
– Link (Text)
– Banner (Image)
– Quality service (Repeater) – Image(Image)
– Text (text)
Service – Item (Repeater) – Post (Post Object).
– Theo cấu trúc được tạo, thì để hiển thị hình ảnh (Image) ta sẽ dùng đoạn code.
<?php echo $header['logo']; ?>
– Để hiển thị dữ liệu kiểu repeater, ta dùng foreach để hiển thị.
Còn kiểu dữ liệu Group, ví dụ ở đây thì $header là 1 group. Ta gọi đến từng giá trị để lấy nó ra VD như: ($header[logo], $header[title], $header[banner])<?php $args = array( 'menu' => '', 'container' => '', 'container_class' => '', 'container_id' => '', 'menu_class' => 'menu-top-menu', 'menu_id' => '', 'echo' => true, 'fallback_cb' => 'wp_page_menu', 'before' => '', 'after' => '', 'link_before' => '', 'link_after' => '', 'items_wrap' => '<ul id="%1$s" class="%2$s">%3$s</ul>', 'item_spacing' => 'preserve', 'depth' => 0, 'walker' => '', 'theme_location' => '', ); wp_nav_menu($args); ?>
<?php foreach (array_slice($service['item'], 1,4) as $item){?>
    <?php
        $post_id=$item['post'];
        $args = array(
            'p' =>$post_id,
        );
        $the_query = new WP_Query( $args );
        // The Loop
        if ( $the_query->have_posts() ) :
        while ( $the_query->have_posts() ) : $the_query->the_post();
        ?>
            <div class="col-lg-6 service-item-col">
                <div class="service-item">
                    <div class="title"><?php the_title(); ?></div>
                    <img data-src="<?php echo get_the_post_thumbnail_url(get_the_ID(),'full'); ?>" alt="" class="lazy">
                    <a href="<?php the_permalink(); ?>" class="link"></a>
                </div>
            </div>
        <?php
        endwhile;
        else :
            echo '<p>không có bài viết nào phù hợp </p>';
        endif;
        wp_reset_postdata();
    ?>
<?php } ?>
Các hàm sử dụng trên trong vòng lặp của WP Query:
Tải file function từ đường dẫn: https://drive.google.com/open?id=1dbGmt7JkKfBgL8-HY6JfngSY_54sRZqJ
Copy tất cả các hàm trong file này và dán vào cuối file funtion.php trong themes đã tạo,
| STT | Hàm | Công dụng |
| <?php the_breadcrumb(); ?> | Hiển thị ra breadscrumbs cho bài viết hiện tại. Áp dụng cho trang bài viết, trang category và trang blog. | |
| <?php pagination_tr(); ?> | Hiển thị ra phân trang cho trang tìm kiếm, blog, category. | |
| limit_words($string, $word_limit) | Giới hạn ký tự cho chuỗi string (dùng cho title, excerpt,…) |
III. Trang single.php và các hàm liên quan.
Trang này dung để hiển thị cho tất cả các bài viết (Posts) của website wordpress. Sau khi mở file single.php sẽ có nội dung như sau:

Nếu không dung tới, ta hãy xóa hàm
get_sidebar();
Lược bỏ các dữ liệu default, ta sẽ có:
get_header();
?>
<?php
while ( have_posts() ) :
the_post();
?>
<!– Gắn toàn bộ html của trang single vào đây –>
<!– Sau hàm the_post(); thì các hàm của WP Query sẽ dùng được –>
<?php
endwhile;
?>
<?php
get_footer();
Gắn toàn bộ html của trang single vào, và sử dụng các hàm gợi ý ở bên trên để hiển thị các dữ liệu của bài viết.


